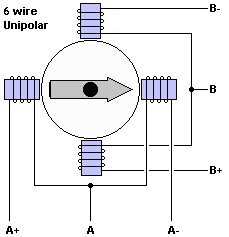
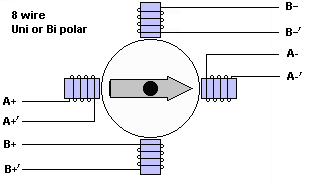
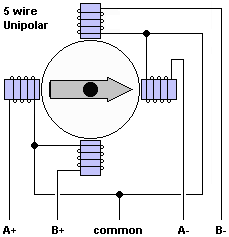
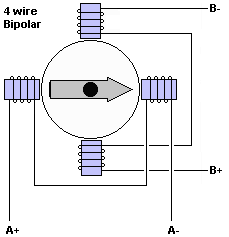
(In case you're wondering; when you short the two outside ends of a winding in a 5 or 6 wire motor and then apply excitation (the battery) across the center-tap and the shorted ends, you are applying excitation to the half-windings in parallel, OPPOSED POLARITY. If you draw a schematic of the hookup this becomes evident.)
Here are examples for 6 and 8 wire motors (I'll use the battery+ohmmeter method, because any old ohmmeter will work and almost everybody has one)

As you are testing, make sure that none of the motor wires are shorted together, other than the ones specified in the test.
Arbitrarily label the wires in one set a, b, and c.
Twist together a and c and hold them to one side of the battery while holding b to the other side. Does the motor turn easily?
- If yes, then b is the center and a and c are the ends.
- If not, then try again:
Twist together leads b and c and connect them to one side of the battery and lead a to the other. Motor turn easily?
- If yes, then a is the center and b and c are the ends.
- If not, then try again:
Twist together leads a and b and connect them to one side of the battery and c to the other. Motor turn easily?
- If yes, then c is the center and a and b are the ends.
- If no, then there’s an unknown problem because those are the only combinations.
Repeat the labelling and test sequence for the other set of wires. (see Stepper Motor Connection Options for all the different ways you can hook your motor up)
8 Wire: Take your ohmmeter and find the pairs of leads that have continuity between them and those four pairs are the two windings (each split in half). Just to make sure you don’t get snookered, measure between one wire of one winding and one wire of all the other windings and make sure you don’t have continuity there. Label the four pairs of leads: a, b; c,d; e,f; g,h.{ed: or use the method above to find the groups without a meter}
Make sure none of the motor wires are shorted together.
Turn the motor shaft and note how difficult (or easy) it is to turn.
Hold wires a and b to the ends of the battery. Note how hard the shaft turns (it should turn a lot harder than before).
{ed: In these next 6 tests, 5 should result in hard rotation and just one should allow the shaft to rotate easier than it did with a and b connected to the battery and almost as easy as it did without the battery. It's difficult to reliably hold the wires to the battery and feel the shaft turning at the same time; use a battery holder with wire clips or some other hands free system to reliably connect the wires.}
1. Twist lead a to c and lead b to d. Hold leads to battery. Does the shaft turn more easily then when power was applied?
-
If yes, then you have found the two halves of one of the windings and you
have them connected parallel-opposing.
You can now label the leads: a=1, b=2,d=3,c=4. - If no, then try again:
2. Twist a to d and b to c. Connect battery. Rotate easier?
- If yes, then a=1,b=2,c=3,d=4.
- If no, then try again:
3. Twist a to e and b to f. Connect battery. Rotate easier?
- If yes, then a=1, b=2,f=3,e=4.
- If no, then try again:
4. Twist a to f and b to e. Connect battery. Rotate easier?
- If yes, then a=1,b=2,e=3,f=4.
- If no, then try again:
5. Twist a to g and b to h. Connect battery. Rotate easier?
- If yes, then a=1,b=2,h=3,g=4.
- If no, then
6. Twist a to h and b to g. Connect battery. Rotate easier?
- If yes, then a=1, b=2,g=3,h=4.
- If no, then there has been an error, because those are all the combinations.
At this point let’s say you have successfully identified leads 1,2,3,4. Now to identify leads 5,6,7,8. Put leads 1,2,3,4 out of the way, but make sure they are not shorted together.
Relabel the remaining leads as a,b,c,d. {ed: you might be left with c,d,e,f or c,d,g,h from the first set of test; that doesn't matter. In any case, remove those old lables and relable the remaining wires a,b,c,d.}
Repeat the part of the testing above that involves a,b,c,d, but use lead numbers 5,6,7,8 for your results instead of 1,2,3,4.

1 is A+
2 is A+'
3 is A-'
4 is A-
5 is B+
6 is B+'
7 is B-'
8 is B-
}
(see Stepper Motor Connection Options for all the different ways you can hook your motor up)
These tests are sure-fire and work every time. Hope this helps

